


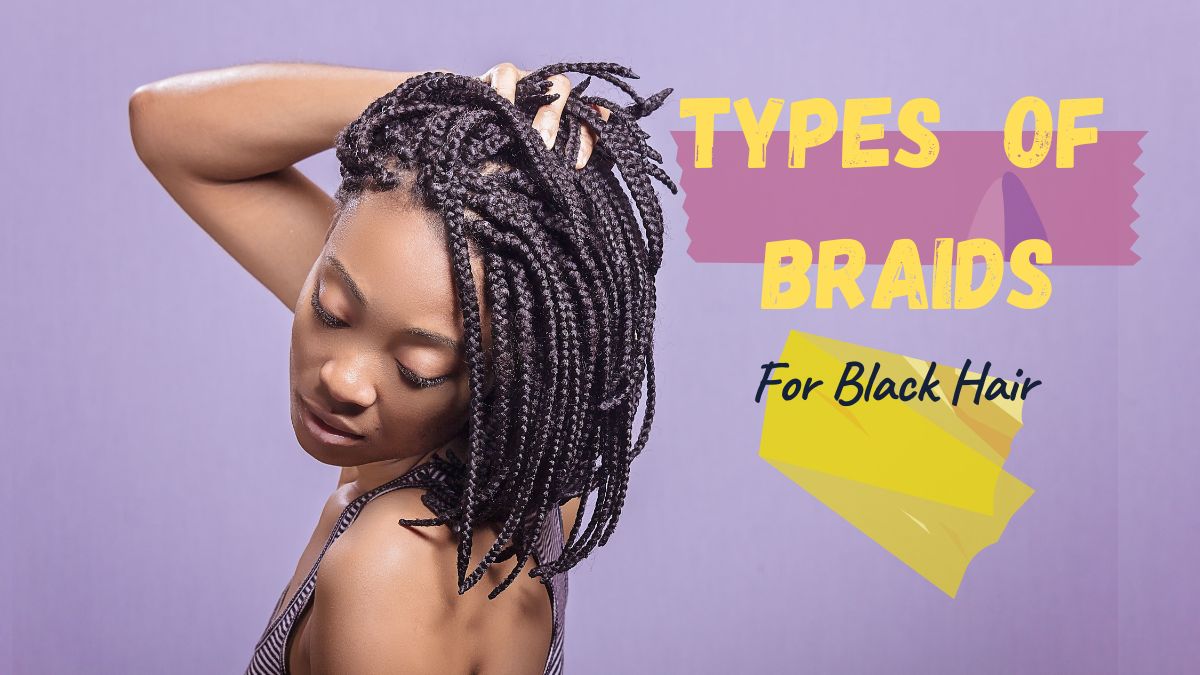
The old traditional three-strand braid to school reminds us of the good-ol days. But with abundance, we are privileged to spoil ourselves with choices. Do you know that there are several types of braids for black hair available in the market? Even many celebrities have already rocked it. After all, why not have something unique when going to a late-night party or a most awaited wedding ceremony?
Definitely, you don’t want the echolalia in your everyday life!!!
Thank God, in this era, you can experiment with umpteen choices and get something done as per your mood.
Ladies, if you have Z-black hair, chances are you’ve gone through a hair journey or two in your life. Whether you’re rocking a weave, braids, or your natural hair, there’s nothing quite like the versatility of black hair. But let’s focus on braids today, shall we?
A girl without braids is like a city without bridges.
Novelist, Roman Payne
Braids have been around for centuries, and let’s be real, black women have been slaying the braid game for just as long. But with so many options out there, how do you choose which one to rock? Well, fear not, my curly-haired and straight-haired sisters, for we have put together a list of the different types of braids that are perfect for black hair.
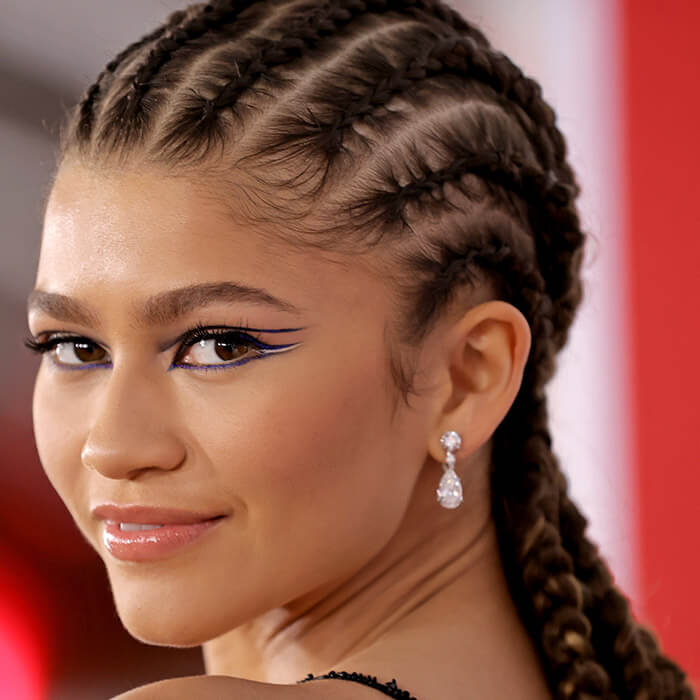
Cornrows – Simplest Types Of Braids For Black Hair
Cornrows is a classic braid style that has been around since the ancient Egyptians. And let’s be real, they’re not going anywhere anytime soon. This type of braids styles for black hair is tightly braided close to the scalp and can be styled in a variety of patterns and designs. Whether you’re looking for a simple and sleek look or a more intricate design, cornrows are the way to go.
How to do Cornrows Braids?
- Begin with clean, tangle-free hair.
- Section your hair into cornrows of the desired size and form. While you work, use clips to keep the other pieces out of the way.
- Divide a tiny chunk of hair into three equal parts at the front of the section you’re working on.
- Continue braiding the three pieces of hair, beginning at the hairline and working your way back. Pick up little bits of hair from the scalp and add them to the braid as you braid.
- Repeat braiding in this manner until you reach the end of the segment, following the natural curve of your scalp. Use a little elastic or hair tie to secure the end.
- Continue to the next segment and braid as before.
- After you’ve braided all of the parts, you can either leave the ends loose or fold them back up against the scalp and fasten them with a bobby pin.
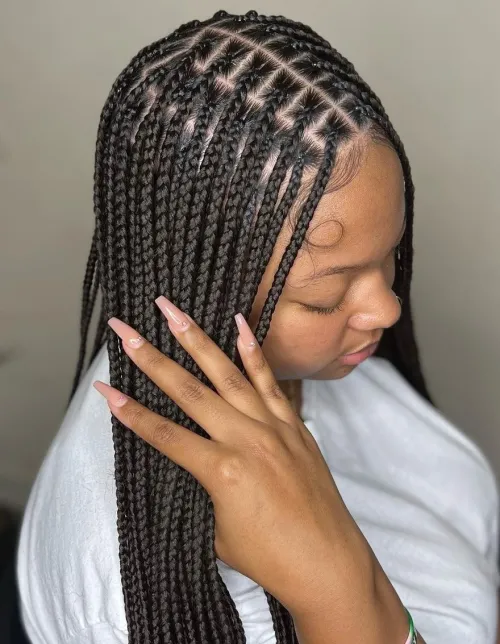
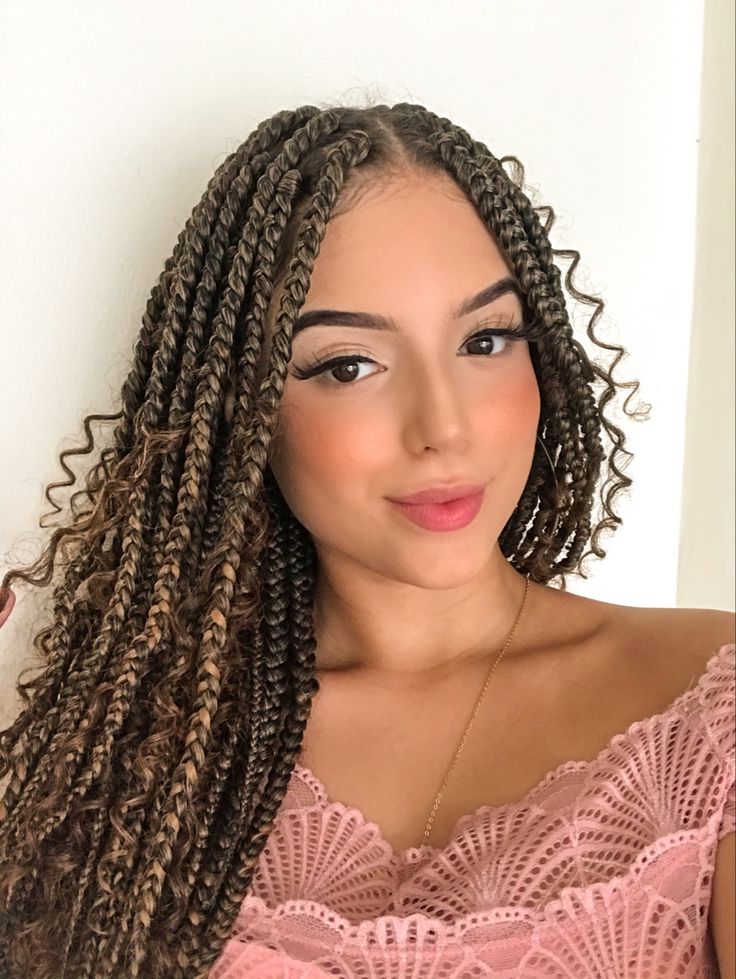
Box Braids – Your Everyday Pick
Box braids are a staple for curly-haired beauties and for good reason. Not only do they allow you to keep your natural hair protected, but they also give you the flexibility to switch up your style whenever you want. From adding in a pop of colour to trying out different braid patterns, the possibilities are endless with box braids. If you have a dark brown colour or even something dark, these types of braids for black hair will always stay a hit.
How to do Box Braids?
- Comb your hair to detangle it.
- Section your hair into the size and form you choose for your box braids.
- Divide a tiny portion of your hair from one of the sections you’ve made into three equal halves.
- Now the time is to braid the three locks of hair, beginning at the hairline and working your way to the ends. Braid the hair for a few stitches to ensure that it is tightly kept in place.
- Separate the three pieces and take a tiny bit of braiding hair.
- Fold the braided hair in half and lay it in the centre of the portion of hair you’re working on.
- Cross one half of the braided hair over the hair segment, so it’s now in the other hand. Cross the second half of the braided hair over the hair segment, so it is now in the opposite hand. This will result in a “twist” in the braided hair.
- Continue braiding with the three pieces, gathering up and incorporating more braided hair as you go. Keep the twists in your braiding hair constant so that your box braids seem nice and uniform.
- Braid the hair all the way to the end and fasten it with a thin elastic or hair tie.
- Repeat this method on each area of hair until all of them are done.
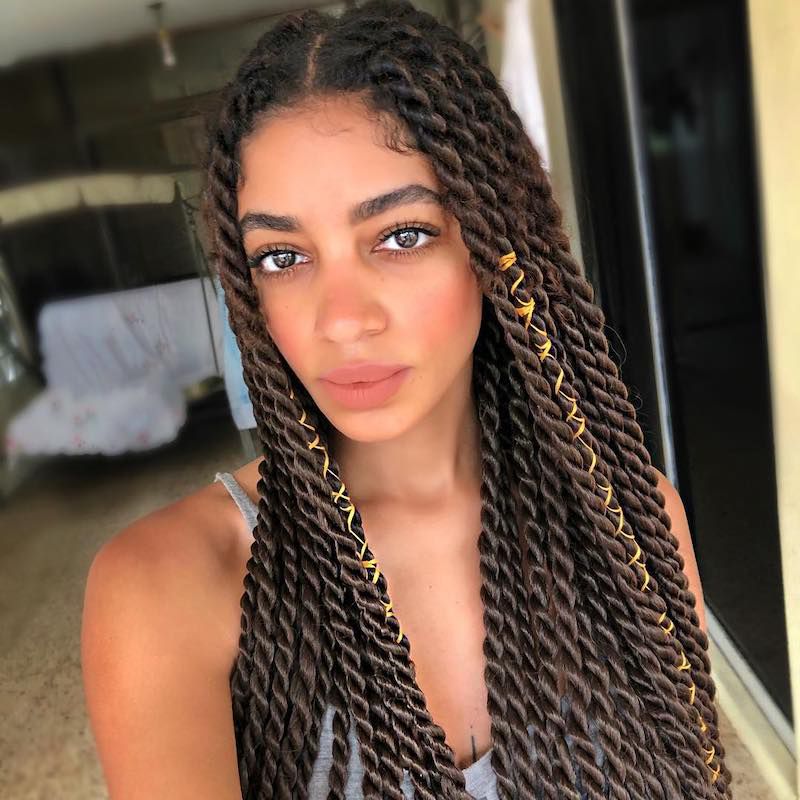
Senegalese Twists
Senegalese twists are a versatile braid style that can be dressed up or down. Whether you’re running errands or hitting the town, these twists are sure to turn heads. And the best part? They’re low maintenance and can last for weeks. Talk about a win-win.
How to do Senegalese Twists?
- Prepare your hair: Wash >> condition >> detangle your hair.
- Section your hair: Part your hair into parts with a comb, beginning at the nape of your neck. With a hair clip, move each portion out of the way.
- Prepare your materials: Synthetic hair extensions (Kanekalon hair is a popular alternative), a rat tail comb, hair gel, and hair scissors are required.
- Apply hair gel to a tiny piece of your natural hair. This will aid the synthetic hair in adhering to your natural hair.
- Take a strand of synthetic hair and carefully fold it.
- Lay the folded synthetic hair below the gelled natural hair portion.
- Separate the natural and synthetic hair into two equal halves.
- Twist the two portions around each other, one of which should be synthetic hair. Continue twisting until your natural hair reaches the finish.
- Trim any extra synthetic hair that is hanging out with the hair scissors.
- Repeat for each piece of your hair until your entire head is covered with twists.
- Once you’ve finished all of the twists, put the ends into hot water to seal them. This will aid in keeping the twists from unravelling.
- Allow your hair to dry completely before styling or wearing it out.
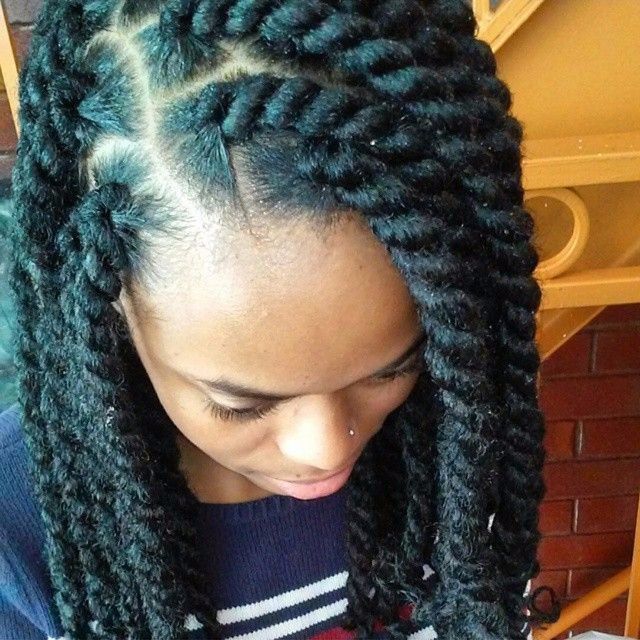
Marley Twists – Quite Popular Types Of Braids For Black Hair
Marley twists are the perfect braid style for those who want a more relaxed and bohemian look. These twists are made with a specific type of hair called Marley hair, which is a type of kinky and curly hair that mimics natural African-American hair. So, if you’re looking for a style that’s both low maintenance and low key, Marley twists might just be for you.
How to do Marley Twists?
- A moisturizing shampoo is your elixir here. Start by washing and conditioning and ensure to detangle your hair thoroughly.
- Start from the neck to part your hair into sections with a hair clip and a sleek comb.
- Get ready your Marley hair extensions, a rat tail comb, hair gel, and hair scissors.
- Take a small section of your natural hair and apply hair gel to it to grip onto your natural hair.
- Take a piece of Marley hair and fold it in half.
- Place the folded Marley hair underneath the natural hair section that you just gelled.
- Divide the natural hair and Marley hair into two equal sections.
- Twist the two sections around each other, using the Marley Braid hair as one of the sections. Continue twisting until you reach the end of your natural hair.
- Use the hair scissors to trim any excess Marley hair that is sticking out.
- Repeat this process on each section of your hair until your entire head is covered in twists.
- Once you have completed all of the twists, give them a quick dip into warm water to seal them.
- Voila; after they dry completely, they are ready for a posh show.
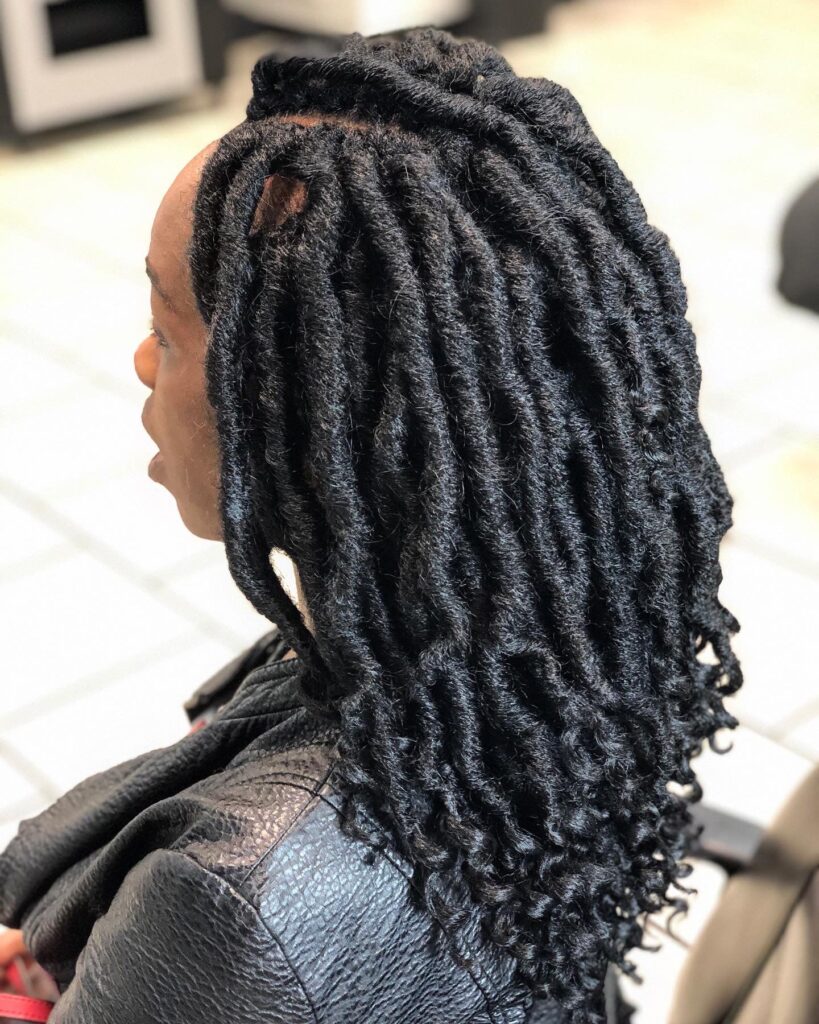
Crochet Braids – A Delicate Art For Beauties
Crochet braids are an excellent choice for people looking for a quick and easy braid design. With this look, you just crochet the braids into your natural hair, and you’re done. Crochet braids come in a variety of styles, from wavy to straight. They’re also a terrific method (in a good way, girl!) to change up your style without hurting your natural hair.
How to do Crochet Braids?
- Cornrow your hair: Begin by braiding your natural hair into close-to-the-scalp cornrows. The size and layout of the cornrows will be determined by the style you like.
- Prepare your materials: Crochet hair extensions, a crochet needle, and hair scissors are required.
- Thread the crochet needle: Insert and close the latch hook into the loop at the end of the crochet needle.
- Hold a portion of the hair extension against your scalp, then draw a loop of hair through one of the cornrows with the crochet needle. Catch the loop with the latch hook and draw the hair through the cornrow until the loop is approximately an inch long.
- Fold the loop in half, then thread the ends of the hair through the loop and tighten them. This will form a knot that will hold the hair to the cornrow.
- Rep the following steps: Attach the hair extension to each cornrow in the same manner, working your way from the rear of your head to the front.
- Trim the hair and get the length that you would love to have.
Goddess Braids – Most Loved Types Of Braids For Black Hair
Goddess braids are a stunning braid style that are perfect for special occasions. Whether you’re hitting the red carpet or attending a wedding, these braids are sure to make you feel like a goddess. With their intricate design and regal look, goddess braids are a true statement piece.
How to do Goddess Braids?
- Girl, you got to moisturize your hair and detangle it with a wide-tooth comb.
- Part your hair carefully and then, apply your fave styling gel or hair wax to each section of hair to make it easier to work with.
- Take a small section of hair from the front of your head and begin braiding it in a cornrow pattern.
- As you braid, gradually add in more hair from the section you’re working on, to create a thicker braid.
- Continue braiding until you reach the end of the section and secure it with a small hair elastic.
- Repeat the same steps on the other side of your head, creating a symmetrical look.
- Take a small section of hair from the front of your head, right where the two braids meet, and braid it straight back.
- Incorporate this braid into the other braids by folding it over and under the other braids and tucking it in at the back of your head.
- Use bobby pins or any other fancy ones to secure the braid in place.
- Finish by using a hair serum to add shine and smooth any flyaway. There you go gorgeous!
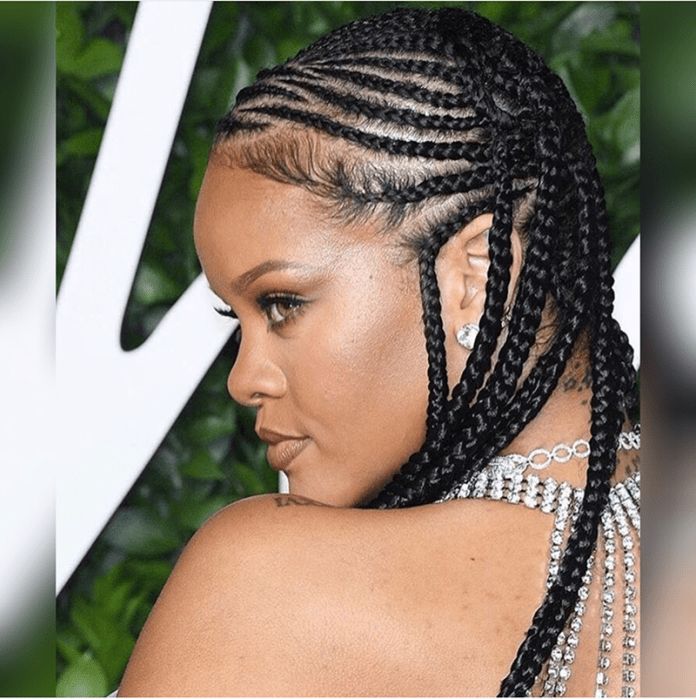
Fulani Braids – Celebrity Favourite Types Of Braids For Black Hair
This stupendous braid style came into notice with late award-winning actress, Cicely Tyson on red carpets in 1960. They style fumed in full throttle from then on and now women or girls love to don their hair with these types of braids. Yes, quite a variety of Fulani Braids are available in the market and voila you’re of course free to choose.
Fulani braids are a unique braid style that are inspired by the traditional hairstyles of the Fulani people of West Africa. These braids are characterized by their small, intricate braids and the addition of gold or beaded accents. If you’re looking for a braid style that’s both edgy and stylish, Fulani braids are the way to go.
How to do Fulani Braids?
- Let’s start with squeaky clean, detangled hair.
- Create a centre part down the middle of your head, dividing your hair into two symmetric sections.
- Take a small section of hair from the front of one section and begin braiding it in a three-strand braid towards the back of your head. Repeat on the other side.
- Once you have braided a few sections on each side, begin adding extensions to the braids.
- Take a small section of the extension hair and fold it in half. Place the folded end underneath the braid and bring the two loose ends over the braid and through the folded end. Pull tight to secure the extension in place.
- Continue braiding, adding extensions as desired.
- Once you reach the nape of your neck, gather all the braids and extensions together and secure them with a hair tie.
- Take a small section of hair from the ponytail and wrap it around the hair tie to conceal it. Secure the end of the wrapped hair with a bobby pin.
- Finish the style by adding beads or other accessories to the ends of the braids, if desired.

Leave feedback about this